
How to Install a WordPress Theme Manually
While WordPress offers thousands of themes through its built-in Theme Directory, there are times when we may need to install a theme manually. This is especially common when using premium themes purchased from third-party marketplaces or custom themes downloaded from a developer.
Thankfully, WordPress makes manual theme installation simple and doesn’t require any coding knowledge.
In this guide, we’ll show you how to upload, install, and activate a WordPress theme manually.
When Should We Install a Theme Manually?
Manual theme installation is useful when:
- Using a premium theme purchased online.
- Installing a custom-built theme.
- Uploading a theme that isn’t available in the WordPress Theme Directory.
- Migrating a theme from another website.
- Restoring a previously downloaded theme.
Most themes are provided as a ZIP file, which can be uploaded directly through the WordPress dashboard.
Step 1: Log in to the WordPress Dashboard
Access your WordPress Admin Dashboard using your username and password.
Once logged in, we’ll have access to all theme management options.
Step 2: Open the Themes Page
From the left-hand menu, navigate to:
Appearance → Themes
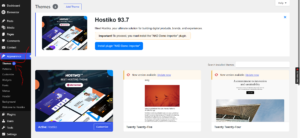
Here, we’ll see all installed themes and the currently active one.
Step 3: Add a New Theme
Click Add New Theme at the top of the page.
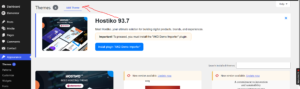
This will open the theme installation screen.
Step 4: Upload the Theme
Click Upload Theme.

WordPress will display an upload area where we can add our theme file.
Step 5: Select the Theme ZIP File
Click Browse or Choose File and locate the theme ZIP file on your computer.
Once selected, click Install Now.
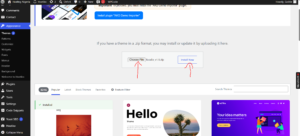
WordPress will automatically upload and install the theme.
Important: Upload the theme as a
.zipfile. Do not extract the ZIP archive before uploading it.
Step 6: Activate the Theme
After the installation is complete, click Activate.
Congratulations! We’ve successfully installed and activated a new WordPress theme.
The design of our website will immediately switch to the newly activated theme.
What to Do After Installing a Theme
Once the theme is active, we can:
- Customize colors and typography.
- Upload our logo and favicon.
- Configure menus and widgets.
- Set up the homepage.
- Install recommended plugins.
- Adjust layout settings through the Customizer.
Common Problems During Theme Installation
“The Package Could Not Be Installed”
This usually happens when:
- The wrong ZIP file is uploaded.
- The file contains documentation instead of the actual theme.
- The ZIP archive was extracted before uploading.
Make sure we’re uploading the correct theme package provided by the theme developer.
Upload Size Limit Exceeded
If the theme file is too large, we may need to:
- Increase the PHP upload limit.
- Upload the theme via cPanel File Manager or FTP instead.
White Screen or Website Errors
If the website encounters problems after activation:
- Switch back to a default WordPress theme.
- Ensure the theme is compatible with our WordPress version.
- Check PHP version requirements.
- Contact the theme developer for support.
Best Practices When Installing Themes
To keep our website secure and fast, we recommend:
- Downloading themes only from trusted sources.
- Keeping themes updated.
- Removing unused themes.
- Backing up our website before switching themes.
- Testing premium themes on a staging site whenever possible.
Tip: Premium themes often come with extra files, including documentation and plugins. If the upload fails, make sure you’re uploading the actual theme ZIP file and not the entire package downloaded from the theme provider.