How to Install a New WordPress Theme
One of the biggest advantages of WordPress is how easy it is to customize the appearance of our website. With thousands of free and premium themes available, we can change the look and feel of our site without any coding knowledge.
In this guide, we’ll show you how to install and activate a new WordPress theme in just a few minutes.
Why Change Your WordPress Theme?
Installing a new theme allows us to:
- Give our website a fresh look.
- Improve user experience and navigation.
- Customize colors, layouts, and typography.
- Add new design features and functionality.
- Create a professional appearance for our brand.
Whether we’re building a blog, business website, portfolio, or online store, choosing the right theme plays a major role in the success of our website.
Step 1: Log in to the WordPress Dashboard
Access your WordPress Admin Dashboard using your username and password.
Once logged in, we’ll have access to all website customization options.
Step 2: Open the Themes Page
From the left-hand menu, navigate to:
Appearance → Themes
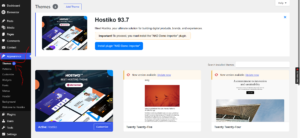
Here, you’ll see the currently installed themes and the active one being used by your website.
Step 3: Add a New Theme
Click Add New Theme at the top of the page.
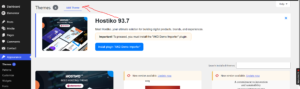
WordPress will open the Theme Directory, where you can browse thousands of free themes.
Step 4: Search or Browse Themes
You can find themes in several ways:
- Use the search bar to find a specific theme.
- Browse Popular themes.
- Explore the Latest themes.
- View Favorites if you’ve saved any.
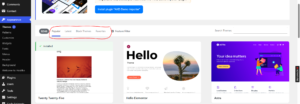
- Filter themes by features, layout, or subject.
Take some time to preview different themes and choose one that matches the style and purpose of your website.
Step 5: Install the Theme
When you find a theme you like, hover over it and click Install.
WordPress will automatically download and install the theme on your website.
This process usually takes only a few seconds.
Step 6: Activate the Theme
After installation is complete, click Activate.
The newly installed theme will become the active theme, and your website will immediately reflect the new design.
Congratulations! We’ve successfully installed and activated a new WordPress theme.
How to Preview a Theme Before Activating
If we’d like to see how a theme looks before making it live:
- Hover over the theme.
- Click Live Preview.
- Review the layout and appearance.
- Activate it when you’re satisfied.
This allows us to test different designs without affecting visitors.
Best Practices When Installing a WordPress Theme
To get the best results, we recommend:
- Choosing lightweight and responsive themes.
- Installing themes from trusted sources.
- Previewing themes before activation.
- Keeping themes updated.
- Removing unused themes to improve security.
- Backing up the website before switching themes.
Popular Types of WordPress Themes
Depending on the purpose of your website, you can choose themes designed for:
- Blogs
- Business websites
- Portfolios
- Online stores (WooCommerce)
- News and magazine sites
- Landing pages
- Educational websites
What to Do After Installing a Theme
Once the theme is active, you can:
- Customize colors and fonts.
- Upload a logo.
- Create menus.
- Configure widgets.
- Install recommended plugins.
- Set up the homepage and blog page.
Tip: Don’t choose a theme based solely on appearance. A fast, mobile-friendly, and well-supported theme will provide a better experience for visitors and improve your website’s performance in search engines.