
How to Write and Publish Your First Blog Post in WordPress
Publishing your first blog post is one of the most exciting milestones when building a website. WordPress makes the process simple, allowing us to create engaging content, organize posts with categories and tags, and publish them for the world to see.
In this guide, we’ll walk through the steps required to create and publish our first blog post in WordPress.
Why Start Blogging with WordPress?
WordPress makes blogging easy and offers powerful features that allow us to:
- Share knowledge and ideas.
- Grow our website traffic.
- Improve search engine visibility.
- Build an audience around our brand.
- Organize content with categories and tags.
Whether we’re starting a personal blog or a business website, publishing quality content is one of the best ways to attract visitors.
Step 1: Log in to the WordPress Dashboard
Access the WordPress Admin Dashboard using your username and password.
Once logged in, we’ll have access to all the tools needed to create and manage content.
Step 2: Create a New Post
From the left-hand menu, navigate to:
Posts → Add New

This will open the WordPress editor, where we can begin creating our blog post.
Step 3: Add a Title and Write Your Content
At the top of the editor, enter a title for your post.
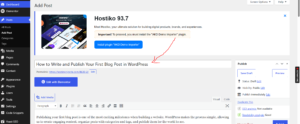
Below the title field, start writing your content.

You can add:
- Paragraphs
- Headings
- Images
- Videos
- Lists
- Links
- Quotes and other blocks
Take your time to create content that is useful and engaging for your audience.
Step 4: Add Tags
From the Post settings panel, locate the Tags section.
Enter keywords related to your article and press Enter after each one.

Examples of tags include:
WordPress
Blogging
Website Tips
Hosting
SEO
Tags help organize content and make it easier for visitors to discover related posts.
Step 5: Choose a Category
Scroll down to the Categories section.
Select an existing category or click Add New Category to create one.

Examples of categories include:
- Tutorials
- WordPress
- Web Hosting
- SEO
- Blogging
Categories help keep our content organized and improve navigation throughout the website.
Step 6: Publish Your Blog Post
Once you’re satisfied with your content, locate the Publish button in the top-right corner.
Click Publish, then confirm by clicking Publish again.

Congratulations! Your first blog post is now live and accessible to visitors.
Tips for Writing Better Blog Posts
To create high-quality content, we recommend:
- Using clear and descriptive titles.
- Breaking content into headings and sections.
- Adding relevant images.
- Using categories and tags appropriately.
- Proofreading before publishing.
- Writing content that provides value to readers.
What’s Next?
After publishing your first article, you can continue growing your blog by:
- Creating more posts regularly.
- Optimizing content for SEO.
- Sharing articles on social media.
- Adding images and featured images.
- Monitoring visitor engagement.
Tip: Consistency is key to successful blogging. Publishing valuable content regularly helps us build authority, attract visitors, and grow our website over time.